Preparing Kitchen Cabinets for Chalk Paint

The transformation of your kitchen cabinets awaits, but before the artistry of chalk paint can begin, a crucial stage must be conquered: preparation. This is not merely a preliminary step; it is the foundation upon which the longevity and beauty of your project rest. Neglect this stage, and your masterpiece may crumble before its time. Let us delve into the meticulous process of preparing your cabinets for a flawless finish.
Cabinet Cleaning and Surface Preparation
A thorough cleaning is paramount. Grease, grime, and years of accumulated residue must be banished. Begin with a degreasing agent, followed by a thorough rinse with clean water. Allow the cabinets to dry completely before proceeding. Any remaining residue will impede paint adhesion, leading to peeling and an uneven finish. The following table Artikels the critical steps in a clear, concise manner:
| Step | Description | Tools Required | Important Considerations |
|---|---|---|---|
| 1. Cleaning | Remove all hardware (knobs, pulls, hinges). Wash cabinets thoroughly with a degreaser, paying close attention to crevices and hard-to-reach areas. Rinse with clean water and allow to dry completely. | Degreaser, warm water, sponges, cloths, screwdriver | Ensure complete drying to prevent paint adhesion issues. |
| 2. Sanding | Lightly sand the cabinet surfaces to create a slightly rough texture for better paint adhesion. Focus on glossy surfaces. | Sandpaper (various grits), sanding block or hand sander | Avoid aggressive sanding that could damage the cabinet surfaces. |
| 3. Filling Imperfections | Fill any dents, scratches, or holes with wood filler. Allow to dry completely and sand smooth. | Wood filler, putty knife, sandpaper | Ensure the filler is completely dry before sanding to prevent cracking. |
| 4. Priming (if necessary) | Apply a high-quality primer, especially on highly glossy or previously painted surfaces. This ensures even paint coverage and prevents bleed-through. | Primer, paintbrush or roller, paint tray | Allow the primer to dry completely before applying chalk paint. |
Sandpaper Selection and Usage, Painting kitchen cabinets with chalk paint
The choice of sandpaper is not arbitrary; it is a strategic decision that directly impacts the final result. Different grits offer varying levels of abrasiveness, each suited to specific tasks. Improper selection can lead to surface damage or insufficient preparation.
The following provides a comparison of commonly used sandpaper grits:
Painting kitchen cabinets with chalk paint – Choosing the right sandpaper grit is crucial. Too fine a grit may not adequately roughen the surface, while too coarse a grit can cause damage.
- Fine Grit (220-400):
- Pros: Smooth finish, ideal for final sanding after filling imperfections.
- Cons: May not be aggressive enough for heavily glossy surfaces.
- Medium Grit (120-180):
- Pros: Versatile, suitable for most surfaces, good for removing minor imperfections.
- Cons: May leave a slightly textured finish if used aggressively.
- Coarse Grit (80-100):
- Pros: Effective for removing old paint or varnish, excellent for heavily textured surfaces.
- Cons: Can easily damage the cabinet surface if used improperly; requires careful application.
The Imperative of Proper Surface Preparation
Proper surface preparation is not merely a suggestion; it is a non-negotiable requirement for a successful paint job. It’s the bedrock of adhesion, preventing peeling, chipping, and an uneven finish. A poorly prepared surface is akin to building a house on shifting sand – destined for collapse. The time invested in this stage is an investment in the longevity and beauty of your newly painted cabinets. Consider it the insurance policy for your project. Failure to properly prepare will inevitably lead to frustration and a subpar result.
Applying Chalk Paint to Kitchen Cabinets: Painting Kitchen Cabinets With Chalk Paint
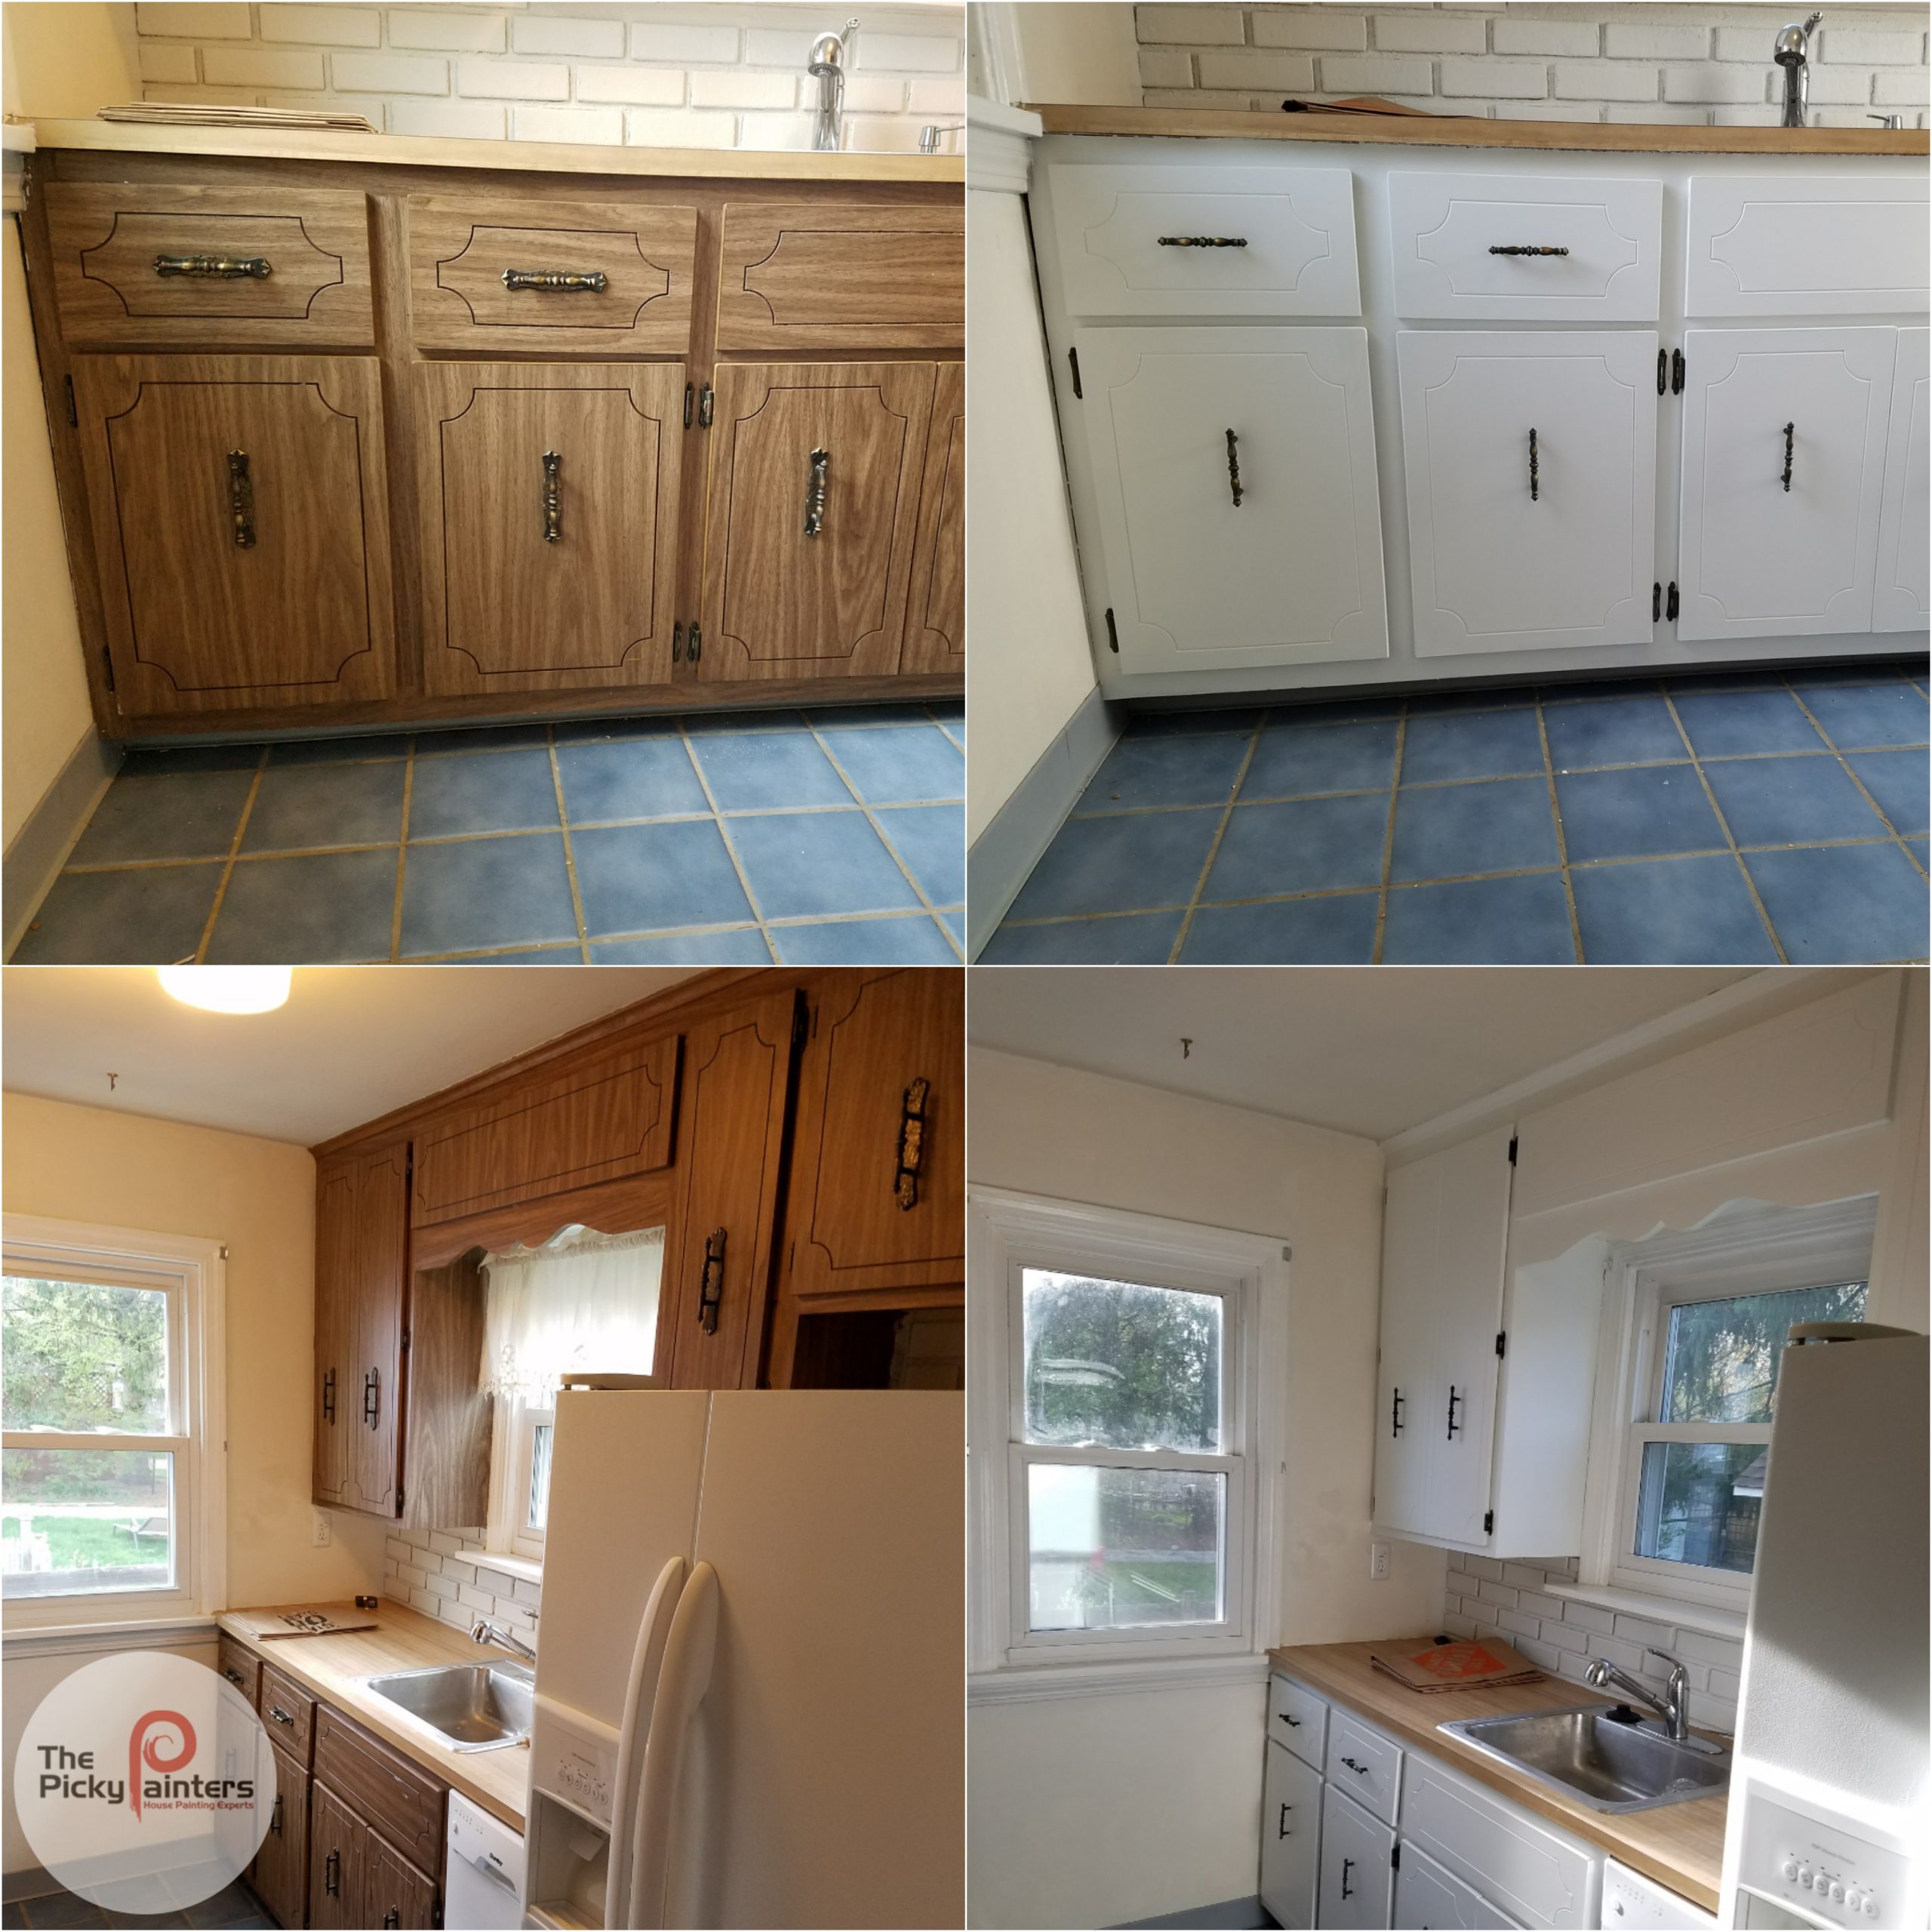
The moment of transformation is at hand. Years of wear and tear, of chipped paint and faded glory, are about to be swept away by the magic of chalk paint. Prepare yourself for a journey into the heart of your kitchen’s makeover, where each brushstroke will unveil a renewed beauty, a testament to your dedication and skill.
The application of chalk paint is a delicate dance between precision and artistry. Each step, from the careful preparation to the final, flawless coat, contributes to the breathtaking result. Patience and a steady hand are your most valuable tools in this endeavor. Let’s begin.
Step-by-Step Application of Chalk Paint
Applying chalk paint successfully requires a methodical approach. Each coat builds upon the last, creating a rich, durable finish that will stand the test of time. Follow these steps for optimal results, and witness your cabinets reborn.
- Prime Time: Begin by ensuring your cabinets are perfectly prepared, as previously discussed. A smooth, clean surface is paramount for even paint adhesion.
- Cutting In: Armed with your finest brush, delicately paint the edges and corners of each cabinet door and drawer front. This crucial step ensures a clean, professional look, preventing the dreaded “brushstroke” effect.
- The First Coat: Using long, even strokes, apply your first coat of chalk paint. Work in sections, maintaining a consistent wet edge to avoid lap marks. Allow ample drying time before proceeding.
- Subsequent Coats: Apply subsequent coats, following the same meticulous process. Each layer deepens the color and enhances the overall finish. The number of coats will depend on the desired opacity and the color of your paint. Allow each coat to dry completely.
- The Grand Reveal: Once the final coat is dry, stand back and admire your handiwork. The transformation is complete. Your kitchen cabinets are now adorned in a stunning new coat, radiating a charm that only chalk paint can provide.
Application Methods: Brushing, Rolling, and Spraying
The method you choose to apply your chalk paint will significantly influence the final result. Each technique offers unique advantages and disadvantages.
- Brushing: This traditional method allows for precise control, ideal for intricate details and cutting in. However, it can be more time-consuming and may require more effort to achieve a perfectly smooth finish. A high-quality brush with soft bristles is essential.
- Rolling: Rolling offers faster coverage, particularly on large, flat surfaces. However, it can be challenging to achieve a smooth finish around edges and details, potentially leaving visible roller marks. Use a short-nap roller for optimal results.
- Spraying: Spraying provides the most even coverage and the quickest application. However, it requires specialized equipment and a well-ventilated area, and may lead to overspray if not handled carefully. This method is best suited for experienced painters.
Visual Representation of the Painting Process
Imagine this: A well-lit kitchen, the air alive with the faint scent of chalk paint. On the counter, a carefully arranged array of tools awaits: a selection of high-quality brushes – a 2-inch angled sash brush for cutting in, a 1-inch flat brush for detailed work, and a soft-bristled roller for larger surfaces. A tray holds the creamy chalk paint, its rich color promising a stunning transformation. Protective drop cloths lie strategically on the floor, guarding against any accidental spills. The painter, armed with patience and precision, begins by cutting in around the cabinet doors and drawer fronts with the angled sash brush, creating crisp, clean lines. Then, using long, even strokes, the first coat of paint is applied, gradually covering each surface with a smooth, even layer. The process is repeated with subsequent coats, each layer building upon the last, creating a deep, lustrous finish. Finally, after ample drying time, the painter steps back to admire the newly painted cabinets, their refreshed beauty a testament to the meticulous effort. The kitchen, once ordinary, is now transformed into a space of elegance and charm.
Finishing and Protecting Chalk Painted Cabinets

The culmination of your kitchen cabinet transformation isn’t the final brushstroke; it’s the enduring shield you apply to safeguard your artistry. Choosing the right sealant is paramount, not just for beauty, but for the longevity of your newly painted surfaces. The wrong choice can lead to chipping, scratching, and a premature return to the daunting task of repainting. Selecting the appropriate sealant requires careful consideration of its properties and your kitchen’s demands.
Sealing your chalk-painted cabinets is the crucial final act, transforming a beautiful but vulnerable surface into a resilient, enduring masterpiece. This protective layer stands between your artistic achievement and the daily wear and tear of a busy kitchen. Proper sealing not only enhances the visual appeal but also extends the life of your cabinets, ensuring years of enjoyment from your hard work. This process demands attention to detail and the selection of the right sealant to achieve the desired level of protection and sheen.
Sealant Options for Chalk Painted Cabinets
A variety of sealants exist, each offering a unique balance of durability, ease of application, and cost. The optimal choice depends on your specific needs and preferences. Consider the level of protection required, the desired finish, and your comfort level with different application techniques.
| Sealant Type | Durability | Ease of Application | Cost | Finish |
|---|---|---|---|---|
| Wax | Moderate; susceptible to scratches and water damage. Regular reapplication is often necessary. | Easy; can be applied with a brush, cloth, or even your fingers. | Low | Matte, subtle sheen. |
| Polyurethane (Water-Based) | High; offers excellent protection against scratches, water, and stains. | Moderate; requires careful application to avoid brush strokes. | Medium | Satin, semi-gloss, or high-gloss. |
| Polyurethane (Oil-Based) | Very High; exceptional durability and protection. | Difficult; requires more skill to achieve a smooth, even finish. Stronger odor. | High | Satin, semi-gloss, or high-gloss. |
| Polycrylic | High; good protection against water and wear. Easier cleanup than oil-based polyurethanes. | Easy to Moderate; Water-cleanup. | Medium | Satin or semi-gloss. |
Ventilation and Health Concerns During Sealing
The sealing process often involves working with potentially harmful fumes. Adequate ventilation is non-negotiable. Open windows, use fans, and consider working outdoors if possible. Wear a respirator mask to protect your lungs from inhaling paint particles and fumes. Always follow the manufacturer’s instructions regarding safety precautions and ventilation requirements. Ignoring these precautions can lead to respiratory irritation, headaches, and other health problems. In cases of prolonged exposure or severe reactions, seek medical attention immediately.

